Sunday, November 17, 2019

Monsters Have Feelings Too!

This year I have been working to bring more SEL (Social Emotional Learning) into my art room.  Students have been using art to identify feelings and I hope on some level process what those feelings mean to them.  This year Fuller Meadow artists have already given feelings to acorns and dots too! 
Perhaps my favorite feelings lesson this year is Kindergarten's Monsters Have Feelings Too
I love doing monster collages in the fall.  We are able to touch on so many important fine motor skills; folding, cutting, drawing shapes, and more! The kinder monsters always come out adorable and are great for a not so "Halloweeny" Halloween display.
This year, we took our monsters one step further and gave them feelings, 
because monsters have feelings too!

We read The Color Monster by Anna Llenas to help us identify emotions.  
Image result for color monster
As we read the book, I gave students a chance to show me (with their me too sign language) if they have had that feeling  that day. I loved seeing students thinking this through and showing me if they had that feeling too.  Many of them saying "me too" for almost every feeling!  

It is so important to acknowledge that all feelings are ok and 
that you can cycle through many different feelings in a day!
As these young kinder artists worked on their monster collages, we talked about how to change the shape of eyes, eyebrows, mouths, etc. to show different feelings.  
They had so much fun bringing their monsters to life.

Arts Integration

We integrated this lesson with their classroom ELA lessons and students 
wrote a sentence about their monster's feelings. Kinder writers used these sentence
blanks to work on identifying color and emotion words.

Connect to Tech

I love showing students how they can take a physical piece of art and "connect to tech"! We used Chatterpix to give voice to these kinder monsters and truly express their emotions.

Mrs. Halligan's Monsters

Mrs. Murphy's Monsters

Mrs. Newton's Monsters

Mrs. Ochoa's Monsters

How do you bring SEL into your classrooms, I'd love to hear!

Sunday, October 13, 2019

MIddleton 2019 Dot Day Celebration


One of my favorite days of the year is International Dot Day.

Dot Day was first celebrated in 2009 by teacher Terry Shay.  Shay encouraged her students to harness the creativity and courage displayed by Vashti in Peter Reynold's The Dot

Image result for The Dot

Today Dot Day has become a global event, celebrated by more than 16 million people in
183 different countries! WOW!

I love Dot Day because it is the one day that both of my school communities
come together to celebrate creativity and courage.
 We start getting ready for Dot Day during the first weeks of school. 
Take a look at the different projects we worked on this year. 

Kindergarten: Dot Prints

1st Grade: Collaborative Dot Community Garden

2nd Grade: Dots Have Feelings Too!

2nd Grade: Coding Dots with BeeBot
 

5th/6th Grade: Augmented Reality Dots with Quiver

All of our creative exploration culminates with Dot Day.
This year celebrated on Monday September 16.

The first signs of Dot Day creativity show up first thing in the morning when a slew of dotastic outfits walk through the doors.  All of the homemade dots brought me so much joy!


I loved seeing whole school spirit!


Some students even brought dot snacks and lunch - How's that for making your mark!


Every year classrooms amaze me with the activities they plan with their students. 
Each one highlights the importance of creativity and courage.  


What's your favorite Dot Day activity?


Wednesday, September 11, 2019

Welcome Back!

We are now few weeks into the new school year and I have finally met all of my young student artists! I wanted to take an opportunity to welcome you all back and share some new happenings in the Middleton Art Program.

This year I will be working hard to help students be risk takers in art and Artovation class!  I always start the year off with a class mantra to motivate and inspire.  Take a look at past mantras here.

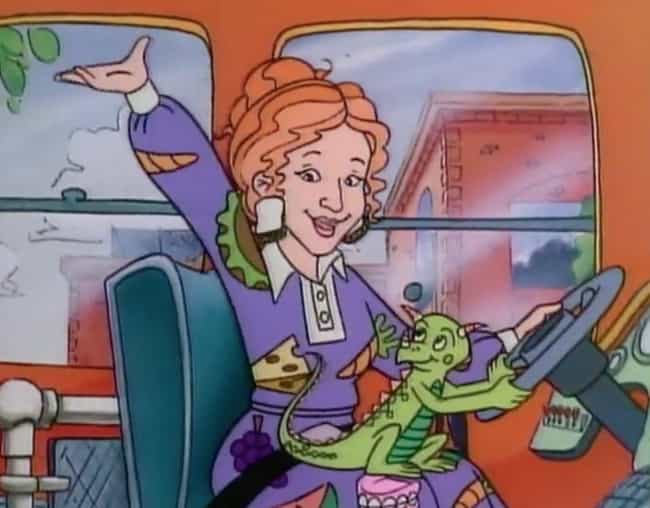
This year's mantra is brought to you by one of my favorite teachers: Ms. Frizzle!
Image result for ms. frizzle
If you are familiar with the Magic School Bus, you know that in each episode Ms. Frizzle encourages her students to take chances, make mistakes, and get messy of course!

I can't think if a better way to help develop risk taking skills in the art room. 

I love this quote by Thomas Edison:
"I have not failed. I've just found 10,000 ways that won't work."

Quotes likes these give us permission to fail.
It is under these conditions that true learning can take place!


Thursday, June 13, 2019

Chatterpix for the Win with 1st Grade Self-Portraits!

Have you tried Chatterpix in your classroom yet?  No, well then you definitely need to.  It's easy to use, super fun, and helps students give voice to their artwork! This year the Fuller Meadow 1st graders used Chatterpix through one of my favorite self-portrait lessons.

1st grade artists started out by learning the basic rules for drawing the face.  They used an eye line to place the eyes right in the middle of the head.  Next, the nose line was added, followed by the mouth line.  Finally we placed in ears and a neck. We basically learned a simple version similar to this diagram shared by Expressive Monkey.

Throughout the project we examined an amazing group contemporary portrait artists like Kehinde Wiley, Amy Sherald, and many others. 1st Graders made choices to make detailed patterned backgrounds in the style of Wiley or keep the backgrounds solid to highlight the figure in the style of Sherald.  Or they choose to put their self-portraits in a background that shows them in everyday favorite situations like figurative artist Jordan Casteel. We used these examples as inspiration in creating the details on our own first grade portraits. 


Finally,1st graders brought their self-portraits to life with the help of Chatterpix.  
They used Chatterpix to describe their unique qualities and show 
how they represented those qualities in their art.

Find your favorite artist's class below and enjoy!
  
Mrs. Higgin's Class
Mrs. Shaffenberg's Class
Mrs. Thomson's Class
Miss Tiexeria's Class

Kindergarten Habitats: No Dioramas Here!

Arts integration is all about collaborating!  It heightens understanding and keeps students engaged and excited about learning. I love finding new ways to help students make critical learning connections to other content areas.This arts integrated science lesson checks off all of those boxes.

When I first started developing this lesson with the Kindergarten team, I knew I didn't want to do a shoe box diorama. Every project I created in elementary school (a looooong time ago) featured a diorama.  I needed something more current.  I discovered this new take on a diorama by
Second Grade Nest while scouring Pinterest: 

Kinders were introduced to habitats as part of their science curriculum.  Research for their habitat took place at home.  Following this, they each picked a habitat and a corresponding animal based on animals available in their science kits.
Finally we were ready to create their habitats in art class.  Although the habitats would eventually turn into a triangle, they start out as a flat 2D paper.  Each student gets a piece of cardstock folded into 4 triangles.


This year I placed a post it note on each side triangle to help them focus on the base or ground of their habitat first. Once the grounds were underway, I walked around a removed the post-its so they could work on the walls.  Kinders had a hard time understanding that the entire bottom triangle was the ground.  It helped to fold up the sides as they worked to show them how that part would form the base of the habitat.  We visualized what you would find if you were crawling around the ground of your habitat.
We also talked about how this was a resist lesson and that they should focus on drawing and coloring small details in oil pastel but to save the larger areas for painting.  That was all day one, phew!

Day 2 is when the 2D papers become their 3D habitats.  Kinders fold up the the sides and tuck and glue the back panel.  We then discussed which elements of their habitat might pop up and created those details out of paper. 

I loved seeing these settings come together.  This year one Kinder said the habitat was kind of like a stage.  What a perfect description because each habitat would become a stage for their very first stop motion animation. That is a whole post on its own but in the meantime check it this picture of how I set up their sets for easy animating!
This project is adorable and these young artists are so excited and proud of what they create.  
Take a look!

Miss Balfe/Mrs. Pacini's Class
Mrs. Halligan's Class
Mrs. Libby's Class
Mrs. Murphy's
Mrs. Newton's Class
Mrs. Ochoa's Class

Wednesday, June 12, 2019

Adopt a Rescue Animal Today!

This is one of my all time favorite projects! 

2nd grade is the perfect age for learning about the importance of shelter animals and why you should adopt not shop.  They do such a great job of bringing out the character and 
personalities of their dogs and cats.

Learn more about this lesson from my original post.

Thinking about adopting a pet?
Let this year's group of 2nd grader artists tell you why you should!

Mrs. Begin/Mrs. Frey's Class
Mrs. Kennedy's Class
Mrs. LeVangie's Class

Mrs. Mulligan's Class
  
Miss Polom's Class


What did you think? Ready to adopt? 
Check out Middleton elementary alum Molly Wogan's
foundation, The PAWS Project to learn all about local animal shelters.


Sunday, June 2, 2019

Summer PD: The "Art" of STEAM

The "Art" of STEAM

I am so excited to announce that I am teaching my 
first graduate level class this summer with Masscue


This course will explore and examine strategies and techniques to create innovative STEAM lessons for your classroom.  Activities will include readings, videos, hands-on activities, discussions, and feedback sessions. The course will identify and study leading innovators in the field, such as Education Closet, Turnaround Arts, and Tricia Fuglestad with Dryden Arts to name a few.  Participants of this workshop will walk away with a library of engaging ideas and lessons that can be implemented starting on day 1!

Are you interested in learning more?!

Sign up now and discover how art integration + STEAM = Total Student Engagement!


Sunday, April 14, 2019

2019 Flint Public Library Art Exhibit: Our BIGGEST Yet!

A few years ago my colleague and I made the switch from doing an art show 
in our school to hosting one in the community at the Flint Library. 
I love that the greater Middleton community gets to see our student's amazing art work. 
The hardest part of this was only having a smaller select group of students on display.

We make a conscious effort to have as many different students as we can from previous years. This year's show did not disappoint! It was our biggest yet with 229 pieces of student artwork on display. 
That is almost 100 MORE pieces than we had last year.
  
I am always amazed how wonderful the student work looks when matted and mounted 
and displayed on the walls of the community room at the library.
 I love grouping Kindergarten artwork next to 5th and 6th grade work with similar colors or styles.

We had an incredible turn out at our opening reception for the 2019 art show.  
I was blown away by the number of  proud artists and families who came!
If you didn't get to see your child's work last week, There's still time! The exhibit will be up at the library for the whole month.  Please note, that some of the 3D works have been moved to the children's room for safe viewing. 

Wednesday, March 20, 2019

Youth Art Month 2019

This month I joined art teachers from across the state to highlight a group of 
talented student artists in a statewide art exhibit.

"Students, grades K through - 12, from across Massachusetts have been selected to have their artwork displayed at the State Transportation Building in Boston. This exhibit, sponsored by the Massachusetts Art Education Association (MAEA), is part of Youth Art Month (YAM), a national celebration held each year during March, that emphasizes the value of art education for all children and encourages support for quality art programs in schools."  - MAEA

The Exhibit will be on display and open to the public weekdays 9-5, 
February 11, 2019 - March 27, 2019. It is closed weekends.
Admission is free. Parking is available in the building for a fee.

Congratulations to these Fuller Meadow and Howe Manning Artists!

Top Row: Sarah C. (K), Lavinia L. (Gr. 2), Michael M. (Gr. 1)
2nd Row: Caden M. (Gr. 5), Massimo M. (Gr. 6)


In addition to my 5 students.  Students from Mrs. Smullin's Howe Manning art classes were also represented at the YAM art exhibit, making the count 11 in all!  I was able to celebrate all of these young artists at the family celebration on March 3.  It was a true display of talent and creativity.

Sunday, March 17, 2019

NAEA19 Boston: "Unpacking the Learning"

Sessions and Lessons and Swag, Oh My!

Last weekend I attended my first National Art Education Conference in Boston, right in my back yard. I took away so many things from the weekend and I'm about to share them all with you!

There were conference sessions, so many sessions. Here's a few of my highlights.
First, I had the amazing opportunity to present on my Art in Dark curriculum
Thank you to everyone who came out to see me, the house was packed! 
I learned a valuable lesson - always bring your own computer cables!

By far the best session on Thursday was Lessons with Maker-Tech Integration,
with Landa Ruen, HS educator from Massachusetts.
   At 5:30 I talked myself into staying attending one more session.
Even though I was so drained, I'm so glad I did.
I participated in a "Top Chef" style clay challenge, learned about using sound as an element in art, 
and learned about the London Empathy Museum's "Mile in My Shoes Exhibit".
What an incredible way to teach children to connect to others.
Thank you Landa!

My Friday highlight was definitely from Tricia Fuglestad and Janine Campbell and their session: Transdigital Art: Transforming Art Experiences Across Physical and Digital Spaces.
If you don't know about Tricia's blog, Fugleblog - you need to check it out. 
I walked away from her session with so many ideas that I can't wait to try using the DoInk Apps. 
And that was just from her half of the session!
Janine showed me so many ways to create "blended learning" experiences. especially using google forms for self-assessment.  Janine also inspired me to start using Artsonia to create digital portfolios for my students! I can't believe I haven't done it sooner.
If you don't already, you MUST follow both of these amazing women: 
Thank you Ladies!


Finally my Saturday highlight was the Someone Who Looks Like Me Session
with South Carolina art teachers Brenda Estella Reyes and Cindy Jesup.
This session was filled with resources to help every student find role models who look just like them.
I loved how these teachers strived to show each and every one of their students how important they are by giving them to tools to feel special and important.
Thank you Brenda and Cindy!

In addition to these wonderful sessions, I tried out a few new materials and techniques!
Activa Air Dry Clay - I am now a convert.
It feels just like earthenware clay but has a drying agent.
This is perfect for my Fuller Meadow K-2s, where I have no kiln.
I also tried out 2 new printmaking techniques.
The first was a reflection monoprint print using Lyra water soluble crayons.
I love the rich and smooth quality of the colors.

I also tried out a new monoprint technique at the Sargent Art booth.
This technique uses a glue stick on transparency paper or plastic paper sleeves
followed by liquid water colors. I can't wait to try this out with students, they are going to love it!

This was truly an incredible conference.  I left inspired and ready to go back to school
and inspire every one of my students.

Peter Reynolds said, "teaching art is not a job, but a mission."
I am so honored to be on this mission!

Monday, March 11, 2019

Animated Swing Scenes with Stop Motion Studio

Second grade artists learned to take their art to the next level with this digital extension of their Swing Scenes.  Learn all about how they created these whimsical self-portraits here!

Second grade artists used this project to become young animators - and they LOVED seeing their art literally come to life.  For this animation we used Stop Motion Studio.  They have a free and paid version.  I have had success teaching students to animate from Kindergarten through upper elementary with this app - it is very user friendly!
Image result for stop motion studio app
After much trial and error, I figured out how to have each students box set up for them like a mini movie set.  This required ALOT of prep!

First I attached a wire to each swing that ran through the back of the box.  This would allow each animator to move their swing to one of 3 positions.
Next, I created a set for each swing scene.  We needed to be able to hide the student animator standing behind the box and block out the background environment around the box. The box is also taped to the base paper so that it can't be moved.  Finally, I also tape the base paper to the table so that can't move!  We took many precautionary steps so that all students could be successful!
Best case scenario is to have the tables set up before the class walks in the door. However, there are days that I have back to back classes and this isn't possible. 
In the cases where I can't have the tables set, I pre-tape the boxes as in the picture above and then set up the iPads and iPad stands on trays to quickly distribute.
Students worked in pairs and each student had one of two jobs, director or animator.  
The director controls the iPad, and the animator is in charge of moving the swing.
Before any animating took place - all students took an oath: 
"I will not move my box, I will not pick up my iPad"
(disclaimer: even though we took that oath - their were definitely boxes and iPads moved!)

The director now opens up the Stop Motion App, and sets up their iPad and iPad stand. Once their camera was centered in the correct position, the used the 2 strips of take to secure their iPad stand. Again a good precaution!
Ok, students were now ready to animate.
We took the first pictures step by step as a group. 

These movies are made up of a rotation of 3 swing positions.  First step, animators marked position 1 by making making sharpie mark on their wire when the swing is in position 1 or the base position. After marking position 1, the director takes 1 picture. Animators now move the swing to position 2 by pushing the wire into the box about 1-2 inches and again marking the wire with sharpie. Once swings where in position, the director takes 1 picture.  The same process for position 3.  Then animators come back down following these steps for position 2 and then back to 1. 
                                 
After completing this cycle as a group, I let student teams go on and finish by themselves. 
They needed to repeat the process 2 more times.  At the end, movies will be made up of approximately 14-16 pictures.  
These young animators were so excited to see their movies finished!  
Take a look at each classes' finished animations.  

Mrs. Begin and Mrs. Frey's Class

Mrs. Kennedy's Class

Mrs. LeVangie's Class

Mrs. Mulligan's Class

Mrs. Polom's Class

Do these movies bring you as much joy as they do me?!