5th grade Artovation students have just finished a new challenge.
How can you integrate lights into a work of art using simple paper circuits?

I designed this challenge to use Chibitronics circuit kits and a WHOLE lot of creative thinking!
Do you know about Chibitronics yet? If not, you have to check them out. Not only do they have all the materials you need to create a successful project but they have tons of tutorials and project examples.
Do you know about Chibitronics yet? If not, you have to check them out. Not only do they have all the materials you need to create a successful project but they have tons of tutorials and project examples.
Artovators started out by learning about how circuits work and the different styles of circuits available to them for this project. They did an internet search using the key words such as Chibitronics, paper circuits and art, and LED lights and art to generate ideas for their project. They recorded all of their ideas on a planning sheet and then had a conference with me to talk through their ideas. I was overwhelmed with their ideas and creativity. Students brought so many different approaches, 2D and 3D, to their conferences, it was so exciting to see where they wanted to go with their project.

This was a true student driven and student choice project.
Once they got the ok, they were ready to get to work!
First step, make a strong piece of art. We discussed the importance of have strong craftsmanship for this project in order to best show off the lights. Some students created larger sketches before moving onto their final project and some moved right into final paper. This process was totally up to them!


Now comes the hard part.
Once their artwork was finished students needed to create a circuit template based on the type of circuit they were using in their work. They could use one already designed by Chibitronics or they needed to design their own. If it worked, I encouraged them to use a Chibitronics template, like the one below. Click here to find many more options!

However, those templates often didn't fit their art work designs.
After much trial and error, here is our template design process
After much trial and error, here is our template design process
1. Lay a paper, roughly the size of the artwork, overtop of your artwork and mark where you want the lights to go with a small pencil dot.


2. Place/Trace the battery ports.
3. Draw the circuit tape lines from the batteries to each light dot. Make sure lines are 1/4 in apart.
 4. Place circuit tape on pencil lines.


4. Hook up the battery
5. Place LED stickers on template
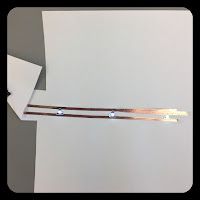

Voila!
The best of this process is hearing all of the oohs and ahhs and each student gets their circuit to work.
The best of this process is hearing all of the oohs and ahhs and each student gets their circuit to work.

Don't get me wrong, there was ALOT of trial and error and trouble shooting,
but we managing to get each student's circuit working!
Students then attached their circuit to the back of their work see the
magic of creating a LED enhanced work of art!


