Wednesday, February 20, 2019

Swinging in Grade 2

I have been looking forward to sharing this project since we started it .... in NOVEMBER! 
 It was a long one with many many steps, but these Fuller Meadow Grade 2 artists 
persevered and finished their projects with gusto.

A while ago, I pinned these swing scenes from Krokotak to one of my Pinterest boards.  Since I love anything whimsy, I immediately feel in love with these boxes and I have been waiting for the chance to develop them into my own lesson ever since! 
Box self portrait diorama craft
If you are like me, you probably cringe when ever you hear the word diorama.  I think it brings me back to the cliche projects of my youth. Everything I learned seemed to end with a diorama.  
I wanted to make sure these boxes had much more depth to them and
 that students would love making them....and they did!

These Swing Scenes can be broken up into 2 main parts, the figure and the box scene.

First step, collecting the boxes.  You are going to need to search high low for boxes for this lesson as each student will need one.  I also wanted to make sure they weren't too big, as they would over power the size of their figure self-portraits.  I requested children's size shoe boxes.  Bigger ones definitely came in but I only used them if I was running very low.  Start collecting boxes while students are working on their figures so you can be sure you have them in plenty of time.

Part 1: Figure Self -Portraits

Day 1: Gesture Drawings: I wanted to make sure that students were truly learning skill as they developed their figure selfies.  We started out with a day of warm ups, capturing gestures with different poses.  2nd graders did a great job with this and especially loved it when they got to be the subjects! (you could skip this step to save time - but it was a very fun day.)
Day 2: Guided Drawings:  This is where the meat of the drawing came in.  
As first graders, we studied the proportions in the face so it seemed fitting that in grade 2 they learn about the rules for drawing the figure.  I pre-lined paper for them into 8 sections and we learned how to fit the proportions of a child into 6 of those sections.  
They took their drawings from stick figures to shape figures. 
Day 2-3: Final Copy Transfer:  Once students had their shape figures on their paper it was time to transfer their drawings to final paper.  Rough drafts were outlined in sharpie, but it still became difficult to see through the paper.  We got creative in order for every student to successfully trace their drawing.  Students used light boxes, windows in hall,and outside windows.  Basically, any surface that would allow more light to shine behind their papers worked as a transfer spot.  Once drawings where transferred, they added clothes, faces, and color!

Part 2: Box Scenes
Day 1: Time of Day: Students were asked to envision what time of day their swing scene would take place.  We brainstormed all different times of day and discussed how we can use different hues to represent that time of day. 
Day 2-3: Perspective using Foreground, Middleground, Background: Next step was to choose a place for their scenes. 2nd graders examined how to use 3 layers of a landscape to show depth in their boxes.  Students were tasked to create 3 layers using oil pastel and cut paper.  They showed such creativity as they brought their scenes to life. Each box represented a unique time and place!
Day 4: Assemble Swing: Finally these 2nd graders were ready to put their finished boxes together.  They could choose between a flat seat swing and a tire swing.  Students used twisteez as their swing wire.  Figures were cut out glued to their swings and they were finished!


Phew!! That was a huuuuge undertaking.  

But we actually weren't done yet....each student had the chance to bring their swings to life using stop motion animation.  Check out my next post to learn how we did it!

Thursday, January 24, 2019

Artovation Circuit Challenge

5th grade Artovation students have just finished a new challenge.
How can you integrate lights into a work of art using simple paper circuits?
chibitronics
I designed this challenge to use Chibitronics circuit kits and a WHOLE lot of creative thinking!
Do you know about Chibitronics yet?  If not, you have to check them out.  Not only do they have all the materials you need to create a successful project but they have tons of tutorials and project examples.

Artovators started out by learning about how circuits work and the different styles of circuits available to them for this project.  They did an internet search using the key words such as Chibitronics, paper circuits and art, and LED lights and art to generate ideas for their project. They recorded all of their ideas on a planning sheet and then had a conference with me to talk through their ideas.  I was overwhelmed with their ideas and creativity. Students brought so many different approaches, 2D and 3D, to their conferences, it was so exciting to see where they wanted to go with their project.

This was a true student driven and student choice project.

Once they got the ok, they were ready to get to work!
First step, make a strong piece of art.  We discussed the importance of have strong craftsmanship for this project in order to best show off the lights.  Some students created larger sketches before moving onto their final project and some moved right into final paper.  This process was totally up to them!
 
Now comes the hard part.

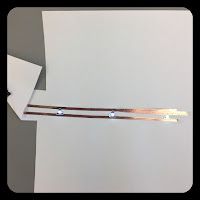
Once their artwork was finished students needed to create a circuit template based on the type of circuit they were using in their work.  They could use one already designed by Chibitronics or they needed to design their own.  If it worked, I encouraged them to use a Chibitronics template, like the one below.  Click here to find many more options!


However, those templates often didn't fit their art work designs.
After much trial and error, here is our template design process

1. Lay a paper, roughly the size of the artwork, overtop of your artwork and mark where you want the lights to go with a small pencil dot.
2. Place/Trace the battery ports.
3. Draw the circuit tape lines from the batteries to each light dot.  Make sure lines are 1/4 in apart.
4. Place circuit tape on pencil lines.
4. Hook up the battery 
5. Place LED stickers on template

Voila!

The best of this process is hearing all of the oohs and ahhs and each student gets their circuit to work.


Don't get me wrong, there was ALOT of trial and error and trouble shooting, 
but we managing to get each student's circuit working!

Students then attached their circuit to the back of their work see the 
magic of creating a LED enhanced work of art!


Monday, January 7, 2019

1st Grade Wintery Landscapes

1st Grade Artists dove into collage with these whimsical Wintery Landscapes.
We spent 1 class using printmaking techniques to create many different textured
and patterned papers.  Each student made a background paper for their artwork
and many other colored papers that we shared as a class.  

Students loved using everyday objects as printmaking objects.
Learn more about our painted paper week here.
We were then ready to put these papers to work. 
This project is inspired by Cassie Stephens 1st grade landscapes. 
Check out her lesson here.

Students had many choices built into this lesson to decide just how "wintery"
they wanted their landscapes to be.  They created a ground by cutting and gluing a
wavy strip of paper; white or green.
They were then ready to start cutting their tree tops.  1st graders had a choice of using circles. ovals, or triangles to create their trees.  These shapes were cut from the many painted papers we created as a class.  Firsties cut many different sized shapes of their choice and arranged them on their background learning about overlapping to create a strong composition. 
Finally, we added tree details using printmaking techniques again to 
add line and dot patterns inside the trees, and of course a little snow!

What do you think of our finished products?


They almost make me ready for a little snow!

Sunday, January 6, 2019

Help my Artovation Students have a Sensor-ational Experience!

Artovation is a Howe Manning specialist class where students 
see the integration of art and innovation at work.

I want to make sure my students have what they need to succeed, so I just created a DonorsChoose.org classroom request.
Follow the link below to learn more about how this project will teach Artovation students all about sensors.
Give to my classroom within the next seven days and your donation will be doubled thanks to DonorsChoose.org. Just enter the code LIFTOFF during checkout and you'll be matched dollar for dollar (up to $50).
In return, you'll get awesome photos of your gift in action and our heartfelt thanks.
Thank you so much,
Catie


P.S. If you know anyone who might be interested in supporting public schools, please feel free to pass this post along.

Monday, December 31, 2018

Kinders Celebrate Fall in the Art Room.

It's December 31st!

 No better time than today to recap what my Kindergarten Artists have been up to this past fall.  
They have been tackling one task after another to build fine motor skills and creative thinking.

I love to start out the year exploring line. 

We started out with one of my favorite line videos from Scratch Garden 
and then brainstormed all sorts of lines.

These lines became an integral piece to our first fall project: Smoosh Pumpkins

Kinders learned they can create a mirror image print by placing paper on top of another 
and pressing them together. 

They loved watching their paint transfer from one paper to the next as then rubbed them together.

Check out this busy Kinder Artist at work!


After making our prints, we used line designs to create pattern and design in the fall pumpkins prints.  The best part is that they made 2 pumpkins so they were able
leave their best at school and take one home! 

Following the pumpkins we moved into fall tissue paper collage leaves.
Students spent 1 class preparing their fall collages. 
We explored colors of fall by reading the "fall" section of Red Sings from Treetops.


If you don't know this book, it is worth checking out!
It's filled with descriptive color poems for each season.  I use it with multiple grade levels!


This tissue paper collage is a favorite because every student's work looks great no matter their skill.  
The bright colors are eye catching and of course we continued to explore line!


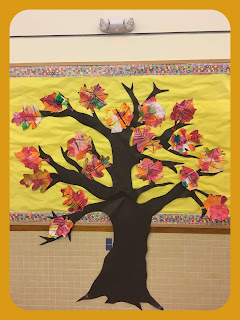
Our falls leavers were a great tie into fall tree sculptures.  
We did this in 2 ways: Tinker Lab exploration and paper bag sculptures.

I used the idea of fall trees as a way to introduce Kinders to the Tinker Lab.  
After going over the rules of the lab they were presented with a challenge:  
create a fall tree that could hold a small bird figurine.


I loved seeing how these guys tackled this challenge and persevered through the different materials!

Finally, we used their success with the Tinker Lab Challenge as inspiration for their Paper Bag Sculptures.  This lesson has been around for a long time and for good reason. It is perfect for little hands to practice important fine motor skills; cutting, twisting, and pinching.  

I love starting this lesson out on the floor as group!


After we get all our tree bases sculpted, Kinders head back to their tables to finish their 3D works.


It was a VERY busy Fall!

What are your favorite fall art lessons?!


Thursday, November 15, 2018

The Art of Letterboxing


This month, The Art Ed Bloggers Network is writing about "artful excursions". 
What better than for me to share my love for Letterboxing!

Usually, that statement is followed by a blank stare from anyone who doesn't know about letterboxing.  So if you happen to be blank staring at your screen right now, read on.  
I am about to share my secret nerdy art hobby with you!

What is Letterboxing?


I like to think of it as an art scavenger hunt.  Letterboxing dates back to the 1850s in England when hikers left postcards along a special route for future hikers to find them. Today, letter boxes are hidden in weatherproof containers with sets of clues that lead searchers to them.

Are you intrigued yet?

So, where does the art come in? 

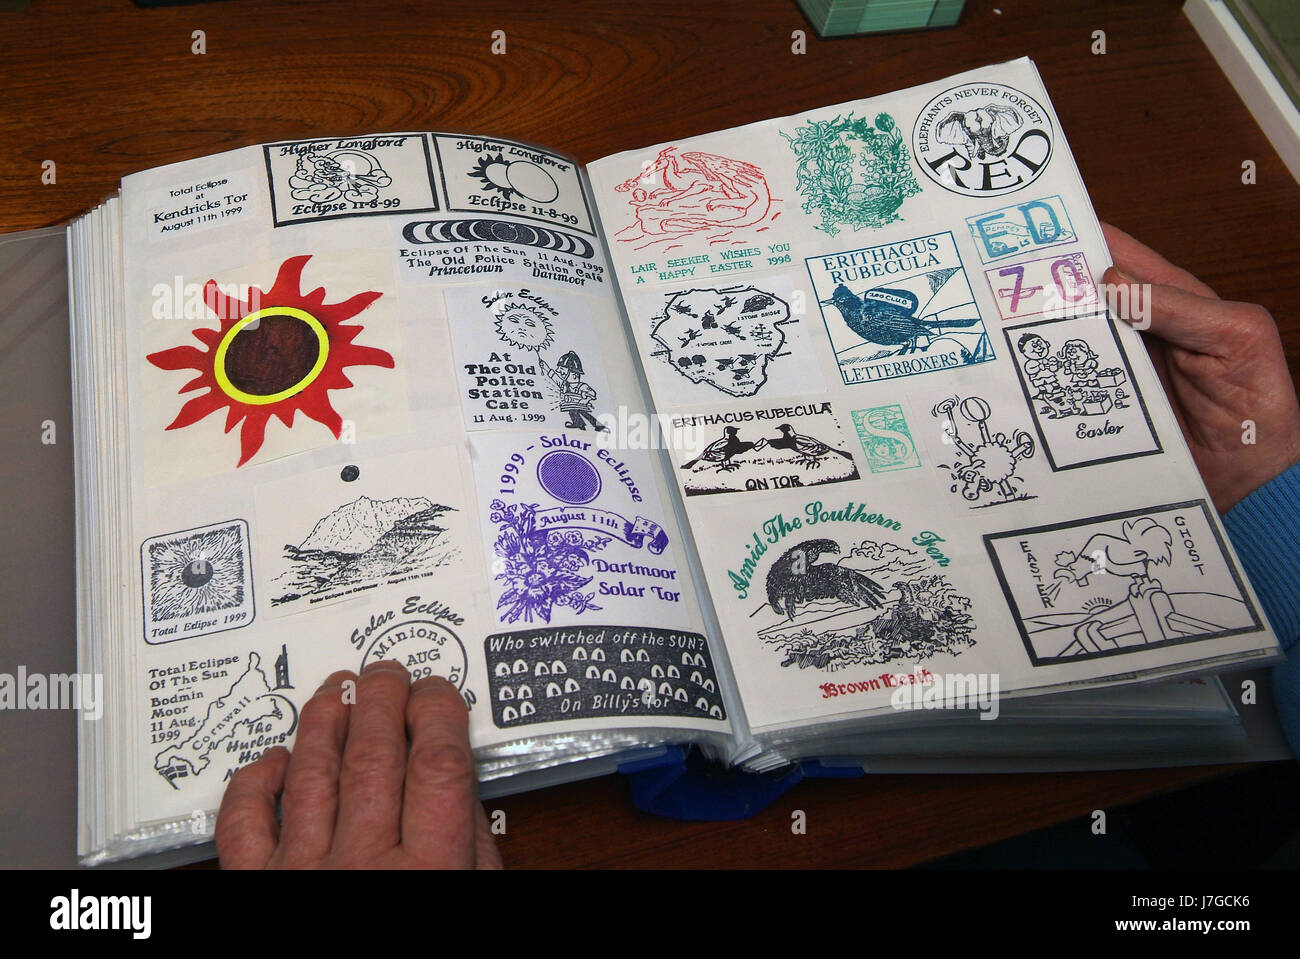
Each letter box contains a hand carved stamp.  Letterbox seekers travel with their own hand carved stamp.  When the box is located stamps are exchanged in special log books as a way to track where you've been and who has visited each box.

Related image

For me it is all about finding the stamps.  Each stamp represents something unique about it's owner, it's location, and has it's own story.  Some stamps are beautifully detailed whereas some are very simple.  Each time I locate a box its a special mystery as I discover what hides inside.

How do you find each box?

In the US, there are two sites where clues are located.  Letterboxing North America and Atlas Quest.
You can search for clues by city/town or zipcode.  Clues can range from easy to difficult.  Clues can be found by car, bike, or on foot.  Letterboxing is for any ability and skill!

I use letterboxing as a way to explore new places and discover areas that I would never have visited otherwise.  I found boxes hiking in the woods, off of bike paths, in cities, even in other countries.  
I even found one letterbox that you could only get to by boat! That one was one my favorites!


How do you get started?

Put together your own letter boxing kit.  You'll need a log book, a pen, a stamp pad, and a stamp.


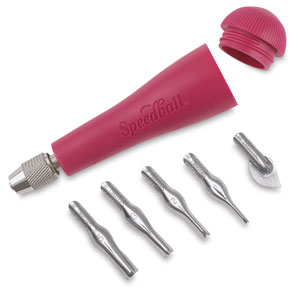
Design your own stamp! Carving a stamp is like creating a mini linocut or woodcut.  Speedball  tools  are easy to use with a speedy carve piece of linoleum.  

Image result for linocut tools  Related image
Design a stamp that represents you! 
My family has changed as my family has grown. I think I may be ready for a new one!

My first stamp
Second Family Stamp 

Sometimes, special bonus prizes and "hitch hiker" stamps are hidden inside letterboxes. 


What are you waiting for?  Get Letterboxing today!